
How to Restore Headlights ( Complete Guide )
Introduction
It is dangerous to drive with yellowed or foggy headlights, and it makes your car look old. Fortunately, you do not have to change your headlights or hire a professional to restore headlights of your car. Headlights can be restored within a short duration with minimal effort and they will appear as if you just bought them from the store. In this blog, I will walk you through the steps on how to refurbish your headlights, so that you can drive safely and have a nice-looking car.

Why Do Headlights Become Foggy?
Oxidation is what mainly makes headlights foggy. UV light from the sun hits on the plastic material of the headlight lens thus resulting in its degradation and oxidation over time. The oxidation produces a cloudy or foggy surface on the lights of the headlights.
Other environmental factors can also contribute to foggy headlights besides oxidation. Dirt, grime, and chemicals from the road form a layer of debris that can make headlights appear foggy. However, oxidation and other environmental factors can result in cloudy headlights that don’t function effectively.
Thus, it is important to periodically maintain and restore headlights for enhanced aesthetics and safety.
Materials Needed to Restore Headlights
To restore headlights, you’ll need the following materials:

Headlight restoration kit or sandpaper: A headlight restoration kit is simply a package of materials specially designed to be used in the restoration of headlights. However, the kits are usually comprised of various grits of sandpaper, a polishing compound, and a UV-protectant coating. This is done by using sandpaper, which gets rid of the oxidized layer. You will require sandpaper grit numbers ranging from lower (such as 600) to higher (approximately 2000). The lower grit is abrasive and is used first while the higher grits are less abrasive and used to refine the finish.

Plastic or glass cleaner: You should clean the headlights thoroughly before the restoration process. A cleaner for plastic or glass can remove any surface dirt, grime, or bugs that could affect restoration. Allow the headlights to dry before proceeding to the next step.
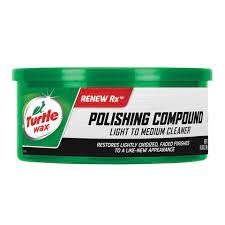
Polishing compound: You will have tiny scratches on the surface once you have sanded the headlights. These scratches are polished out by a polishing compound to restore the clear, shiny finish of the headlights. You’ll use a cloth to apply the compound and use a buffing motion to polish the surface.

UV sealant: After that, you will need to ensure the headlights are not damaged easily again. After polishing off the headlights, a UV sealant is applied. This sealant forms a protective barrier that helps keep the harmful UV rays away from the plastic, the cause of headlight oxidation and yellowing.
Masking tape: Ensure that you don’t harm the surrounding paint and trim on your car while sanding and polishing the headlights. These parts are then covered with masking tape to keep from any restoration process.

Microfiber cloths: Microfiber cloths are important throughout the process; for cleaning the headlights, applying the polishing compound, and buffing the surface. This is good because microfiber is soft, non-abrasive, and does not leave any lint.
Water: Wet sanding involves utilizing water together with the sandpaper. Wet sanding minimizes the friction and makes the sandpaper to last longer. Additionally, this helps to flush away the material being cut and allows you to see the difference more clearly.
Remember, safety first! Always wear appropriate safety gear like gloves and safety glasses as you are restoring your headlights. Also, always read and comply with the instructions for use that come with your material, particularly in the case of the headlight restoration kit.
How to Restore Headlights?
Let’s break down each step in more detail:
Step 1: Clean the Headlights
First, you should clean your headlights thoroughly. This step is critical because any dirt or grime on the headlights can cause scratches on the headlights during the sanding process. One should use a plastic or glass cleaner and a microfiber cloth to clean the surface of the headlights. Ensure that the headlights are dry before proceeding with the next step.
Step 2: Mask off the Area
As one prepares for the restoration of the car, make sure you protect surrounding areas from unintended damage. Cover the paint and the trim around the headlights using masking tape. Make sure that the area covered is enough to allow for the maximum range of motion during sanding and polishing.
Step 3: Wet Sanding
Wet sanding is a common procedure that is applied to remove the oxidized layer on the headlight surface. Begin by using finer grit sandpaper like 600 grit. Damp the sandpaper and headlight lens. The sand is in a horizontal plane, keeping the surface damp. This ensures reduced friction and therefore prevents the sandpaper from getting clogged with dust and dirt.
Step 4: Progress to Higher Grit Sandpaper
Following that, you’ll use the lowest-grit sandpaper followed by increasingly higher grits. This step is almost the same as the previous one, only you sand vertically towards the previous grit. It reduces the visibility of scratches and helps to ensure a nice finish. Ensure that the surface remains wet in this process.
Step 5: Polish the Headlights
The final step is to polish the headlights after you are through with the sanding. Use a clean microfiber cloth to polish the surface, applying a polishing compound. Polish the headlights using a buffing motion until they are clear. While this step may take time and effort, it will be essential if one wants this new bright look.
Step 6: Apply UV Sealant
The last and final step of the headlight restoration is to add a UV sealant. The sealant will guard your headlights from the damaging UV rays of the sun leading to the development of fogs and yellowing of the headlights. Utilize a clean microfiber cloth to apply the sealant and dry it following the product directions.
Conclusion
Headlight restoration may not be the most exciting project to undertake, but it will greatly improve the look and safety of your vehicle. If done correctly and with the proper materials, you can maintain your headlights looking shiny and new. Do not forget that patience and carefulness are the main keys to quality headlight restoration.